










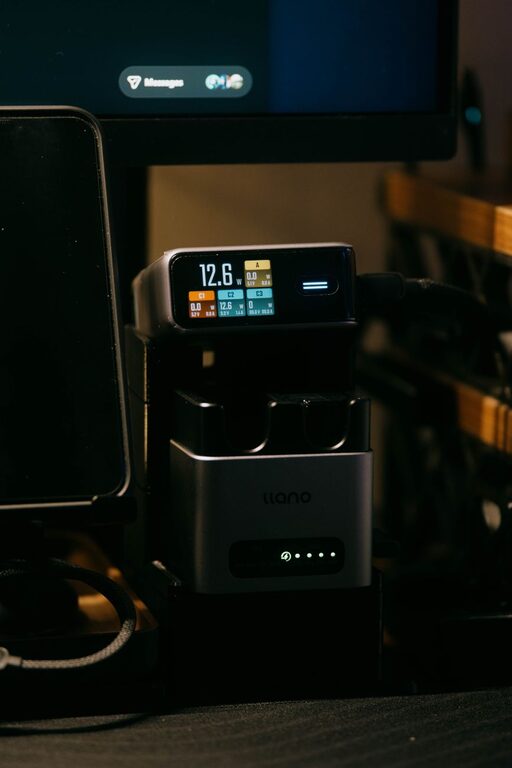
A charging station gives every device a designated place to recharge. Instead of searching for loose cables or using outlets in different rooms, you can keep your phones, tablets, smartwatches, headphones, and other electronics together in one convenient location.
Setting up a charging station does not require expensive equipment or advanced technical skills. With a suitable location, a few basic supplies, and a little planning, you can create a setup that works well for your home, office, or shared space.
Choose the Best Location
Start by deciding where the charging station should go. The best location depends on how and when you use your devices.
Consider these options:
– Entryway: A useful choice for charging phones, keys, and other items you carry outside.
– Bedside table: Convenient for overnight charging, especially for phones and watches.
– Kitchen counter: Practical for shared household devices, tablets, and speakers.
– Home office: Ideal for work phones, headphones, cameras, and other equipment.
– Living room shelf: A good central location for family devices.
Choose a spot near a wall outlet, but avoid placing the station where cables will cross walkways or become easy to pull. Keep it away from sinks, stovetops, and other areas where water or heat could cause problems.
If several people will use the station, choose a central location. If it is mainly for your personal devices, a bedside table or desk may be more convenient.
Take Inventory of Your Devices
Before buying accessories, list the devices you want to charge. This helps you avoid purchasing too many or too few ports.
Your list might include:
– Smartphones
– Tablets and e-readers
– Smartwatches
– Wireless earbuds
– Cameras
– Portable game systems
– Bluetooth speakers
– Battery packs
– Fitness trackers
Check which cables each device uses. Many newer devices use USB-C, while some older electronics may use other connectors. Smartwatches and certain accessories may require a special charging dock or cable.
Write down how many devices you usually charge at the same time. You may own eight devices but only need space for four or five at once. Planning for your normal routine keeps the station simple and prevents unnecessary clutter.
Select a Charging Method
There are several ways to power a charging station. Choose the method that best matches your devices and available space.
Multiport Charging Hub
A multiport charging hub connects to one wall outlet and provides several charging ports. This is often the cleanest option for a station used by multiple devices.
When choosing a hub, look for:
– Enough ports for your regular devices
– A mix of USB-C and other commonly used ports, if needed
– A reputable brand with basic safety features
– A size that fits your chosen location
– Clear information about power output
Avoid choosing a product based only on the number of ports. A station with many ports may not charge several devices quickly if its total power is limited.
Charging Dock or Stand
A charging dock keeps devices upright and organized. Some docks include built-in connectors, while others hold your own cables in place.
A dock can make it easier to:
– See which devices are charging
– Keep phones off the countertop
– Reduce cable tangles
– Store several devices in a small area
Choose a dock with slots wide enough for your devices, including any protective cases. If your phone or tablet has a thick case, confirm that it will fit before purchasing.
Wireless Charging Pad
A wireless charging pad can reduce the number of cables needed for compatible devices. It works well for phones, earbuds, and some watches.
Wireless charging is convenient, but it may not suit every device. You may also need to remove certain thick or metal accessories. Keep the charging surface clear and place the device in the correct position for reliable charging.
Organize the Cables
Cable management is one of the most important parts of a charging station. A few simple tools can make the area look neater and easier to use.
Helpful supplies include:
– Cable clips
– Velcro straps
– Small cable ties
– Adhesive cord holders
– Cable labels
– A small box or tray
Place clips near the front or edge of the station so the cables stay within reach. Use a different cable for each regular device, and label cables that look alike. Labels are especially helpful when several family members use similar phones or tablets.
Avoid tightly bending or sharply folding cables. Give each cable enough length to reach the device without pulling. Replace cables that have exposed wires, damaged connectors, or signs of overheating.
A cable box or tray can hide extra length, but do not pack cables tightly together. Leave enough space for air to move around the charging equipment.
Add a Stable Surface
Your charging station should sit on a flat, stable surface. A tray, wooden organizer, shelf, or desktop container can define the area and keep small items from spreading across the room.
A tray is useful because it can hold the charging hub, cables, and devices in one place. Small dividers can separate phones from watches, earbuds, or other accessories.
If you prefer a wall-mounted setup, use hardware designed for the wall type and follow the product instructions. Make sure the mount can support the weight of the devices and charging equipment. Do not place heavy items where they could fall onto people, pets, or furniture.
Pay Attention to Safety
A well-organized station should also be safe and easy to monitor.
Follow these basic guidelines:
– Use chargers and cables from reliable sources.
– Do not use equipment with damaged cords or cracked housings.
– Keep charging equipment away from water and excessive heat.
– Do not cover a charging hub with clothing, papers, or blankets.
– Avoid overloading an outlet or power strip.
– Keep cables away from areas where they may be tripped over.
– Place the station where children and pets cannot easily pull devices down.
– Unplug equipment if it becomes unusually hot, smells burnt, or makes unusual sounds.
Use a power strip only when it is suitable for the equipment connected to it. A power strip with built-in overload protection can provide an additional layer of protection, but it should not be treated as a replacement for careful setup.
Create a Simple Daily Routine
The best charging station is one that is easy to use every day. Give each device a regular spot and return it there after use.
For example:
– Keep phones in the front slots.
– Place tablets in larger rear slots.
– Store watches and earbuds in small compartments.
– Keep spare cables in a labeled container.
– Leave one open space for a device that needs occasional charging.
You can also choose a regular charging time, such as after dinner or before bedtime. This reduces the chance of discovering an uncharged device when you need to leave.
Review the station every few weeks. Remove unused cables, recycle damaged accessories through an appropriate electronics program, and adjust the layout as your devices change.
Keep the Setup Flexible
Technology and charging standards change over time, so avoid making your station too permanent. A modular organizer and removable cable clips make it easier to update the setup later.
Leave one or two spare ports if possible, but do not buy more equipment than you need. A flexible station can support new devices without becoming crowded.
With the right location, a suitable charging method, and basic cable organization, you can create a charging station that saves time and keeps your space tidy. Start with the devices you use most, build around your daily routine, and improve the setup as your needs change.